Baby Care
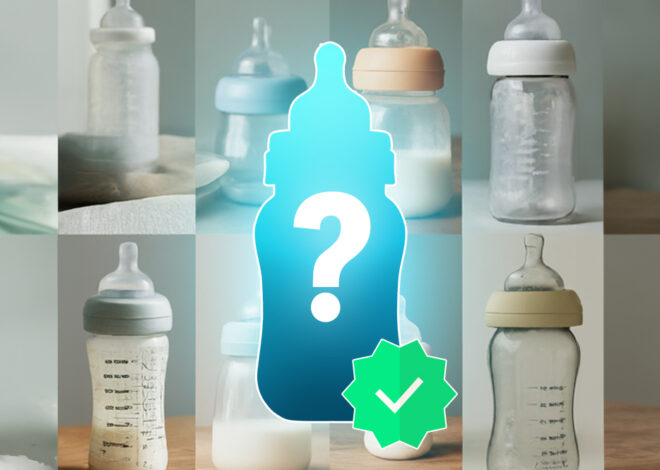
Top 6 Baby Bottles of 2024: Expert Picks for Happy Feeding!
1. Build a Registry: Babylist Bottle Box offers variety (plastic & silicone) to find your perfect match.
2. Beat the Gas: Dr. Brown’s Options+ reduces air bubbles for smoother feeds (more parts to clean).
3. Breastfeeding Buddy: Lansinoh bottles mimic the breast for easy switching with only 4 pieces for easy cleaning.
4. Squishy & Squeezable: Nanobébé’s silicone bottle is easy to hold, and has anti-colic vents, but takes longer to warm breast milk.
5. Value Pick: Evenflo’s classic plastic bottles are affordable, lightweight, and promote a good latch (faint measurement markings).
6. Cleaning Champion: Comotomo’s silicone bottle has only 3 parts and a wide opening for easy cleaning (flexible design might tip).
7. Happy Feeding, Happy You: Experiment with different bottles to find the perfect fit for your baby and you!
The Power of Touch: Why Infant Massage is Essential for New Moms and Their Babies
1. Bonding Through Touch: Infant massage strengthens the emotional connection between you and your baby by releasing oxytocin, the “love hormone.”
2. Better Sleep for Everyone: Regular massage can promote longer and more restful sleep cycles for your baby, leading to a happier (and more well-rested) you!
3. Soothe Gas and Colic: Gentle strokes on your baby’s tummy can help ease discomfort caused by gas and colic.
4. Boosts Development: Massage stimulates the nervous system, promoting better circulation, muscle tone, coordination, and even sensory processing.
5. Stress Less, Baby!: Just like adults, babies can experience stress. Infant massage can help lower stress hormones, promoting relaxation and well-being.
6. Simple to Get Started: All you need is a warm, quiet space, a soft surface, and gentle oil (or breast milk!).
7. More Than Massage: The true magic lies in the focused time spent connecting with your baby through touch, singing, and eye contact.
The Messy but Marvelous World of Self-Feeding baby : A Guide for New Moms
1. Baby-Led Weaning (BLW): Skip the spoon-feeding, let your baby explore safe, self-serveable finger foods around 6 months.
2. Look for the Signs: Good head control, reaching for food, losing the tongue-thrust reflex – these indicate your baby might be ready for BLW.
3. Benefits Galore: Boosts independence, motor skills, and self-esteem while encouraging exploration of tastes and textures.
4. Start with Soft & Safe: Steamed veggies, ripe fruits, and well-cooked starches cut into finger-length pieces are perfect for tiny grasps.
5. Gear Up for Messy Fun: High chair, washable bib, suction-base placemat, and an open-cup sippy are your mealtime essentials.
6. Safety First: Always supervise, cut food into safe sizes, avoid choking hazards, and introduce new foods one at a time.
7. Beyond 6 Months: The adventure continues with a wider variety of textures and flavors as your baby’s skills develop.
Decoding Your Tiny Chef: Hunger Cues and Feeding Your Newborn
1. Early Hunger Cues: Watch for rooting (turning their head towards your touch), sucking on fists, or becoming increasingly active and fussy.
2. Feeding on Demand: Newborns eat every 2-3 hours, sometimes more often, based on hunger cues, not a set schedule.
3. Quantity Over Time: Expect portion sizes to start small (1-2 ounces) and gradually increase as your baby grows.
4. Signs of Satisfaction: Look for contentment after feeding, regular wet/dirty diapers, and steady weight gain.
5. Breastfeeding or Formula: The choice is yours, both provide essential nutrients for your baby.
6. Helpful Products: Consider nursing pillows, bottle warmers, or breast pumps depending on your feeding method.
7. Relax and Learn: Every feeding is a chance to bond with your baby. Trust your instincts and seek help if needed.
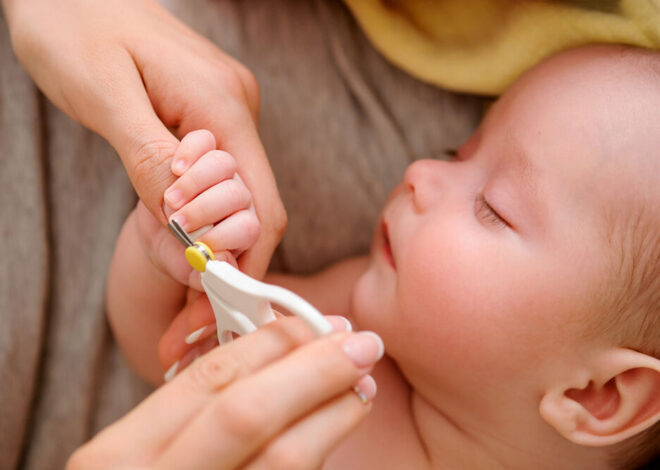
Trimming Your Tiny Trendsetter’s Nails: A Guide for New Moms
1. Pick the Perfect Moment: Patience is key! Choose a time when your baby is relaxed and content. This could be after a soothing bath, while they’re happily munching on a bottle, or even during a light nap (be extra gentle if trimming while they doze).
2. Prepare for Success: Before diving in, have everything you’ll need within reach: baby nail clippers or scissors (whichever you find more comfortable), a gentle emery board, and good lighting to ensure a clear view of those tiny nails.
3. Get Cozy, Get Secure: Find a comfortable chair with good lighting and settle in. Securely hold your baby on your lap or on a changing table. Having a partner or trusted adult present to hold your baby while you clip can be a big help, especially in the beginning.
4. Isolate the Nail: Use one hand to gently separate each finger or toe, giving yourself a clear view and easy access to the nail you’ll be trimming.
5. Clip with Confidence: Follow the natural curve of the fingertip for fingernails and clip straight across. Remember, less is more! Avoid cutting too close to the skin to prevent any nicks or painful experiences for your little one.
6. Special Care for Toenails: Toenails are a bit different. Clip straight across to avoid ingrown nails, which can be quite uncomfortable for your baby.
7. Finishing Touches: After clipping, use the emery board to gently smooth out any rough edges left behind by the clippers. This will ensure your baby’s nails are smooth and comfortable.
Choosing the Right Diaper for Your Precious Little One: A New Mom’s Guide
1. Newborn needs: Focus on diaper sizes and finding the right fit with a diaper size chart (e.g., Pampers size chart).
2. Perfect fit tips: Look for weight recommendations, check the waistband fit, and ensure no gaps around the legs.
3. Beyond size: Consider features like softness, leak protection, wetness indicators, and refastenable tabs.
4. Popular brands: Explore Huggies brand diapers, Pampers diapers, Luvs diapers, and others based on recommendations.
5. Finding diapers: Search online for “diapers near me” or look for them at stores and online retailers.
6. It’s a journey: Experiment with different brands and sizes as your baby grows.
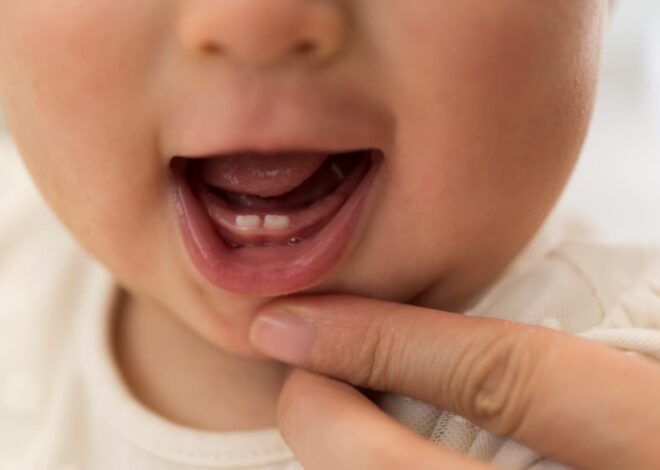
Teething Troubles: Signs, Relief, and Soothing Your Teething Baby
1. Spot the Signs: Watch for fussiness, chewing, drooling, sleep disruptions, and low-grade fever – all signs your baby might be teething.
2. Chew on This: Provide safe, firm teethers for your baby to gnaw on. Chilled teethers offer extra comfort.
3. Gum TLC: Gently massage your baby’s gums with a clean finger to ease discomfort.
4. Cool Relief: Offer a cool washcloth for your baby to chew on.
5. Mesh Magic: Fill a mesh feeder with chilled fruits or veggies for a soothing gum massage.
6. Natural Options: Explore chamomile (talk to your pediatrician first!) for calming effects.
7. Consult Your Doctor: Always check with your pediatrician before using any medication or teething gels.
Starting Solid foods: A Guide for New Moms
1. Hold off on solids: Wait until around 6 months to introduce infant solid food. Breast milk or formula is all your baby needs for the first half-year.
2. Look for signs of readiness: By 6 months, your baby might have good head control, sit with support, and lost the tongue-thrust reflex – signs they’re ready for solids. 4-month-olds aren’t there yet, so skip starting solids at 4 months. Their little bodies need more time.
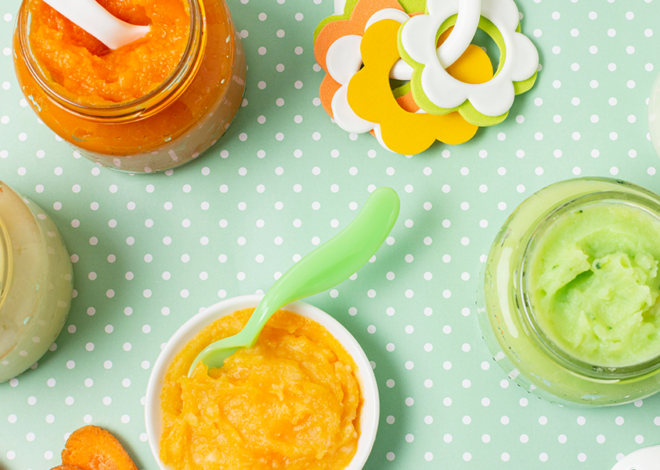
3. Start simple, stay safe: Begin with single-ingredient purées like avocado or sweet potato. Avoid sugary, salty, or honey-added purées.
4. Tiny portions are key: A teaspoon or two is enough for a first taste. They’ll play more than eat, and that’s okay!
5. Go slow and steady: Introduce one new food every 3-5 days, watching for allergies. Slow and steady wins the race!
6. Follow your baby’s lead: They’ll show you when they’re done. No need to force-feed – a happy eater is a healthy eater!
7. Make mealtime a blast: Keep it fun and light! Silly faces, sing-song voices, and letting them explore with their hands are all part of the joy.
Bath Time Bliss: A Guide to Safely Bathing Your Newborn
1. Bath Time Basics: Gather supplies, warm water (test temperature!), washcloths, gentle baby shampoo (optional).
2. Safety First: Small tub, baby bath seat (optional, never leave unattended!), support head and neck.
3. Quick & Gentle: 5-10 minute baths, cleanse body with washcloth, rinse well, pat dry with warm towel.
4. Skip Tummy Time for Newborns: Their neck muscles aren’t strong enough yet.
5. Make it Fun! Sing songs, talk softly, let them splash gently.
6. Routine is Key: Consistent bath time helps with bedtime.
7. Enjoy the Moment: Cuddle your baby and cherish this special time.
Keeping Your Little One Cozy: How to Dress Your Baby for Winter
1. Prioritize warmth and function: Focus on comfortable fabrics like organic cotton, merino wool, and fleece for base and mid layers. Choose waterproof and windproof outerwear for ultimate protection.
2. Embrace the layers: The key to winter dressing is layering. This allows for easy temperature regulation and outfit adjustments throughout the day.
3. Don’t forget the little things: Hats, mittens, and booties are essential for keeping tiny hands, heads, and feet warm. Choose fun colors and patterns to add a touch of personality.
4. Think cost-effective: Utilize sales, shop for “cheap baby clothes” and “cheap newborn clothes,” consider second-hand options, and borrow from friends or family.
5. Focus on essentials: Prioritize buying base layer items and a good quality snowsuit. You can get by with fewer mid-layer pieces.
6. Safety first: Avoid overheating your baby and always remove bulky outerwear before buckling them into a car seat.
7. Accessorize for style: Scarves, colorful hats, and patterned mittens add a playful touch and allow you to personalize your baby’s winter look.
Keeping Your Little One Secure: A New Mom’s Guide to Daycare (Expanded)
1. Start Early & Research: Begin your search 3-4 months in advance. Look for options online or ask local parents (daycare centers near me).
2. Know Your Needs: Drop-in or full-time? Consider location, cost (cheap daycare options!), age (newborn daycare), and setting (center or in-home).
3. Tour & Observe: Look for clean spaces, age-appropriate toys, separate nap/diaper areas, and secure outdoor play areas. Observe staff-to-child ratios and ensure caregivers are warm and attentive.
4. Ask Key Questions: Inquire about safety protocols, communication (daily updates?), curriculum, diapering, feeding (including allergies!), and outdoor play procedures.
5. Security is Key: Ensure secure entry/exit, age-appropriate cameras, and coded door locks. Verify low child-to-staff ratios and background checks for all staff.
6. Pack Comfort Item: Provide a familiar stuffed animal or blanket for your baby to feel secure.
7. Label Everything: Label bottles, pacifiers, clothes, and even diapers with your baby’s name to avoid mix-ups.
When Your Little One Cuts a Finger: A Guide for New Moms
1. Stay Calm: It’s okay to feel flustered, but staying calm reassures your baby.
2. Minor Cuts: Apply gentle pressure with a clean cloth to stop bleeding.
3. Clean the Wound: Wash with mild soap and lukewarm water, avoid harsh chemicals.
4. Bandage (Optional): Use a breathable adhesive bandage for small, non-bleeding cuts.
5. Seek Medical Attention: Deep cuts, excessive bleeding, or infection require a doctor.
6. Comfort Your Child: Cuddle, offer a toy, or use a pain reliever (over 6 months, consult pediatrician).
7. Prevent Cuts: Babyproof your home and supervise playtime.
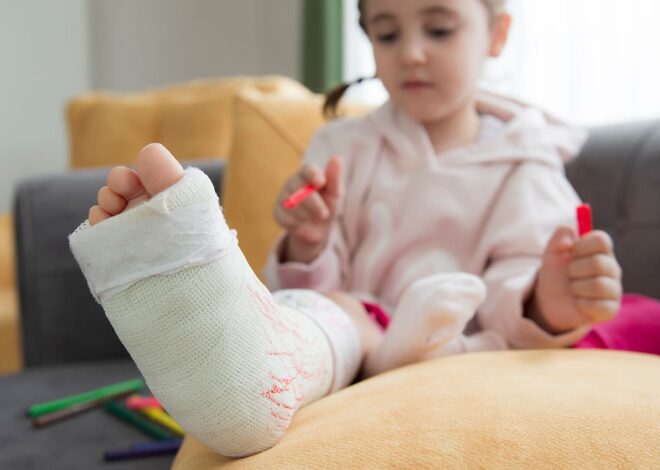
What to Do When Your Toddler Fractures a Bone: A Guide for New Moms
1. Recognize Signs: Look out for signs of a fracture such as pain, swelling, bruising, or difficulty moving a limb.
2. Seek Immediate Help: Contact your pediatrician or visit the emergency room if you suspect a fracture for prompt medical attention.
3. Comfort Your Child: Provide reassurance and comfort to your toddler with soothing words, gentle touches, and distractions like toys or songs.
4. Follow Medical Advice: Adhere to treatment instructions provided by healthcare professionals, including immobilization and pain management.
5. Home Care: Follow-up with at-home care measures such as elevating the injured area, applying ice packs, and administering prescribed medication.
6. Safety First: Childproof your home to minimize risks of accidents, removing potential hazards and supervising your toddler during playtime.
7. Invest in Safety: Consider purchasing baby products like padded play mats, corner guards, safety gates, ergonomic carriers, and supportive high chairs to enhance safety measures in your home.
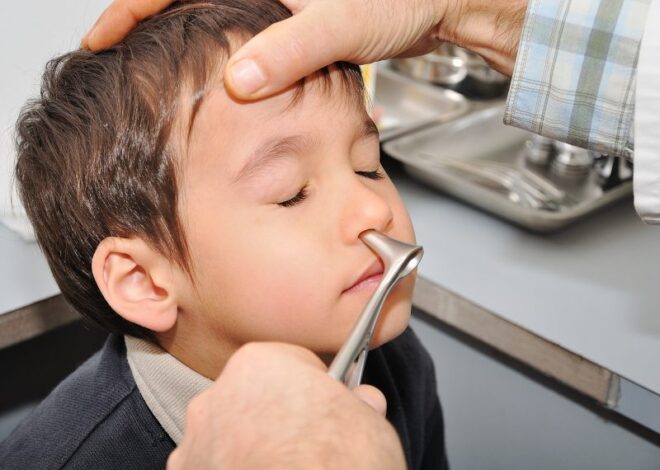
Life-saving tips when a Toddler Stuck Something in the Nose
1. Curious Kids, Stuck Objects: Young children love exploring with their mouths and noses, but small objects can easily get stuck.
2. Common Culprits: Tiny toys, food pieces, cotton balls – anything small enough to fit can become lodged.
3. Button Battery Danger: These can cause serious damage very quickly. Seek immediate medical attention if suspected.
4. Magnetic Mischief: Magnets attract each other inside the nose, causing tissue tears. Get medical help right away.
5. Stay Calm, Don’t Force: If something’s stuck, reassure your child and avoid forceful removal with tweezers.
6. Easy Removal Only: If the object is visible and you can grab it safely, remove it with your fingers.
7. Doctor Time: See a doctor if the object is hidden, breathing is difficult, there’s bleeding, or you suspect a battery or magnet.
Toddler Troubles: Protecting Your Little One from Stomach Bugs (Stomach Virus, Stomach Flu)
1. Toddler Trouble: Tummies aren’t invincible! Rotavirus, norovirus, and other nasty bugs can cause stomach flu (gastroenteritis) in little ones.
2. Spot the Symptoms: Vomiting, diarrhea, fever, and crankiness are all signs your toddler might have a stomach bug.
3. Hydration is Hero: Fight dehydration with frequent sips of fluids or an electrolyte solution like Pedialyte.
4. BRAT Diet: Bland is best! Bananas, rice, applesauce, and toast are gentle on upset tummies.
5. Rest and Relief: Plenty of sleep and a warm tummy compress can ease discomfort.
6. Doctor Calls: Severe vomiting, bloody stools, or dehydration are signs to call your pediatrician.
7. Prevention is Power: Frequent handwashing, disinfecting surfaces, and up-to-date vaccinations can help keep your toddler healthy.
How to Check Your Toddler’s Temperature: A Guide for New Moms
1. Normal Infant Temperature: Know the range! Normal newborn temperature is 90°F (32.2°C) to 100.4°F (38°C) rectally, while normal infant temperature under the armpit is around 97°F (36.1°C).
2. Signs of Fever: Watch for fussiness, poor feeding, unusual sleepiness, and flushed cheeks – these might indicate an infant fever.
3. Taking Temperature: Rectal is most accurate for infants under 3 months, while forehead and ear thermometers work well for older babies.
4. Fever in Newborns: Call your pediatrician right away if your newborn baby has a rectal temperature of 100.4°F (38°C) or higher.
5. Fever in Infants: For infants (3-6 months), call your doctor if their rectal temperature reaches 102°F (38.8°C) or higher.
6. Bringing Down Fever: Dress lightly, offer fluids, use a humidifier, and lukewarm baths can help. Never use rubbing alcohol
7. When in Doubt: Infant fever charts are a guide, but always consult your pediatrician about newborn fever medicine and managing your baby’s fever.
Early Detection is Key: Signs of Hearing Loss in Your Baby
1. Startle Response: Does your baby flinch at loud noises (0-3 months)?
2. Soothes to Voice: Does your baby calm down when you talk (0-3 months)?
3. Turns to Sounds: Does your baby turn their head towards new sounds (3-6 months)?
4. Babbles & Vocalizes: Does your baby make cooing or babbling sounds (3-6 months)?
5. Understands Tone: Does your baby respond differently to happy vs. stern voices (3-6 months)?
6. Simple Words: Does your baby understand basic words like “no” by 12 months?
7. Speech Development: Does your baby speak clearly and follow simple instructions (1-3 years)?
Why Does My Toddler Grind Their Teeth? Solutions for Restful Nights
1. Grinding Gears: Hearing your toddler grind their teeth at night? It’s common (and treatable)
2. Nighttime Noise: Teeth grinding, called bruxism, is harmless in most toddlers.
3. Growing Up: Grinding might be your toddler’s way of exploring their developing jaw muscles.
4. Ouchie Relief: Grinding can also be a sign of earaches or teething discomfort.
5. Stress Busters: Changes or anxieties can cause teeth grinding. Create a calming bedtime routine!
6. Night Guards: In some cases, a dentist-prescribed night guard can protect teeth.
7. Sweet Dreams: Relax, mama! Most toddlers outgrow grinding, so focus on restful sleep.
Keeping Your Little One Safe: Preventing Food Poisoning in Infants and Toddlers
1. Wash Often: Keep your hands and your baby’s hands clean before food prep, feeding, and diaper changes.
2. Sanitize Supplies: Bottles, nipples, pacifiers, and utensils need thorough washing and sanitizing.
3. Wash Produce: Wash all fruits and veggies, even if peeling them, to remove bacteria.
4. Cook Thoroughly: Use a food thermometer to ensure safe internal temperatures for meat, poultry, and fish.
5. Skip Unpasteurized: Avoid giving your child unpasteurized milk, juice, or cheese.
6. Leftovers Matter: Reheat food only once and refrigerate leftovers promptly.
7. Clean Surfaces: Regularly disinfect countertops, cutting boards, and utensils used for food prep.
Signs of Dehydration in Toddlers: Timely Actions, No Panic.
1. Spot the Signs: Dry mouth, less pee, and sunken fontanel (soft spot on head) can signal toddler dehydration.
2. Act Fast: Offer fluids like breastmilk, formula, or water. Pedialyte can also help with electrolytes.
3. Prevent Dehydration: Toddlers forget to drink, so offer fluids regularly and carry a sippy cup on outings.
4. Fruits for Fun: Watermelon, cucumber, and popsicles made from diluted juice are hydrating and yummy.
5. Skip Sugary Drinks: Sugary drinks dehydrate further. Opt for water or milk instead.
6. Hydrating Meals: Soups and fruits/veggies in your toddler’s diet add fluids and nutrients.
7. Fun Cups & Bottles: Leak-proof sippy cups, colorful straw bottles, and a water dispenser fridge encourage drinking.
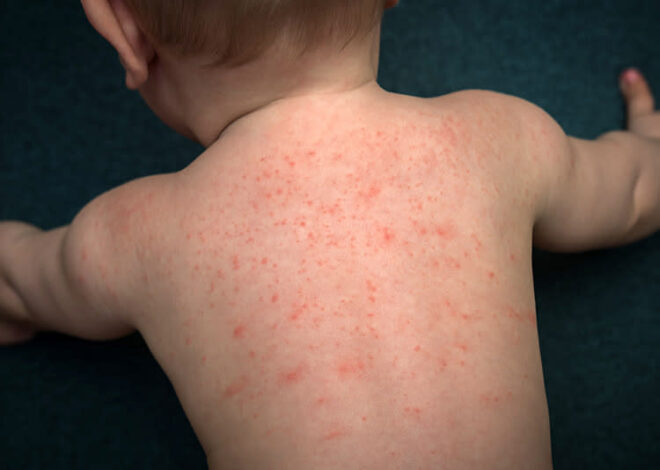
Don’t Panic, Mama: A Guide to Common Baby Rashes
1. Newborn rashes? Don’t panic! Many are common and treatable.
2. Diaper rash: Frequent diaper changes and zinc oxide paste can soothe this red, bumpy irritation.
3. Eczema (Atopic Dermatitis): Manage dry, itchy patches with gentle skincare, identifying triggers, and prescribed medications.
4. Heat rash: Keep your baby cool, use breathable fabrics, and consider a cool mist humidifier for tiny red bumps.
5. Contact dermatitis: Identify and remove irritants (soaps, detergents) or allergens (poison ivy) causing the itchy, red rash.
6. Hives: Raised, red welts? Look for allergic reactions and consult your doctor about antihistamines for itching.
7. Newborn rash? Consult a pediatrician for a proper diagnosis and personalized advice.
A New Mom’s Guide to Keeping Your Baby’s Belly Button Clean: From Umbilical Cord Care to Tummy Time
1. Umbilical Cord Care: Wash hands, clean the base of the cord with a damp washcloth (plain water!), dry thoroughly, avoid diaper friction, and watch for infection signs.
2. Belly Button Care After Cord Falls Off Clean during bath with a gentle wash, check the belly button during tummy time (no cotton swabs!), and avoid cleaning inside.
3. Newborn Baths: Sponge baths until the cord falls off, then short baths in a baby tub with warm water and gentle cleanser.
4. Tummy Time: Make it a daily routine, starting with short sessions and gradually increasing duration.
5. Milestone Mania: Celebrate your baby’s development in head control, cooing, smiling, and rolling over (at their own pace).
6. Stock Up on Essentials: Diapers, wipes, diaper rash cream, baby wash, lotion, washcloths, towels, onesies, sleepers, pajamas, and blankets.
7. Routine is Key: Consistent bath time and diaper changes create a smooth day and security for your baby.
How to Keep Newborns Safe During Cold Weather?
1. Layer Up: Dress your baby in breathable layers like cotton and fleece. One more layer than you’re comfortable in is a good rule of thumb.
2. Cozy Accessories: Don’t forget hats, mittens, booties, and maybe a scarf (avoid loose ones!) to keep tiny extremities warm.
3. Home Sweet Home: Aim for a room temperature between 68°F and 72°F and dress your baby lighter indoors to prevent overheating.
4. Moisturize Regularly: Cold air dries out skin. Use a fragrance-free baby moisturizer after baths and diaper changes.
5. Winter Must-Haves: Invest in a fleece-lined carrier, warm stroller blanket, and a nasal aspirator for winter outings.
6. Safe Winter Walks: Time outings for the warmest part of the day, keep them short, and avoid bundling your baby in the car seat.
7. Indoor Fun: Tummy time, sensory play, baby massage, and warm baths keep your little one entertained and comfortable indoors.
Sweet Dreams: What clothing is suitable for a baby during sleep?
1. Fabric First: Choose breathable cotton for comfort and temperature regulation.
2. Layer Up (or Down): Dress your baby in one more layer than you’re comfortable in.
3. Footed Pajamas or Onesies: Keep tiny toes warm and cozy.
4. Say No to Loose Bedding: Blankets and pillows are a suffocation risk for babies under 1 year old. Opt for sleep sacks instead.
5. Swaddle for Newborns: It promotes calmness and better sleep, but discontinue once they show signs of rolling.
6. Dress for the Season: Lightweight layers for summer, warmer options for winter.
7. Check for Overheating: Feel your baby’s tummy – sweaty means too hot!
Bottle Feeding Your Newborn: A Guide for New Moms
1. Perfect Latch: Ensure a comfortable, leak-proof seal between your baby’s mouth and the bottle nipple for effective feeding.
2. Paced Comfort: Take breaks during feeding to allow swallowing and prevent overfeeding or gas.
3. Bonding Touch: Make eye contact, talk softly, and cuddle your baby to create a calming feeding experience.
4. Cleanliness Counts: Wash bottles, nipples, and dispensers thoroughly. Sterilize for newborns as instructed.
5. Travel Ready: Pack a cooler bag with ice packs and consider a portable bottle warmer for on-the-go feedings.
6. Mix Right: Follow formula instructions precisely for safe and accurate preparation.
7. Temperature Test: Lukewarm is ideal, but some babies prefer room temperature. Test on your wrist.
Learning the Basics of Swaddling for New Parents
1. Swaddling is the practice of snugly wrapping your newborn in a blanket to mimic the feeling of being in the womb.
2. Mastering the art of swaddling can help soothe your baby, promote better sleep, and provide a sense of security.
3. Follow a simple step-by-step guide to swaddle your newborn, ensuring the blanket is snug but not too tight.
4. Swaddle your baby during nap times and bedtime to help them feel calm and comfortable.
5. Pay attention to your baby’s cues and preferences, as not all newborns enjoy being swaddled.
6. Transition out of swaddling around 2-3 months of age or when your baby starts showing signs of rolling over.
7. Consider using swaddle wraps or sleep sacks with Velcro or zipper closures for added convenience and security.
7 tips while choosing Toys for Infants: A Guide to Do’s and Don’ts
- Prioritize Safety: Choose toys that are free from small parts, sharp edges, and potential choking hazards.
- Age-Appropriate Selection: Select toys that match the developmental stage of the infant, promoting sensory and motor skill development.
- Avoid Toxic Materials: Ensure toys are made from non-toxic, BPA-free materials to safeguard the infant from harmful substances.
- Stimulate Senses: Opt for toys that engage multiple senses, such as textures, colors, and sounds, to enhance cognitive development.
- Easy to Clean: Select toys that are easy to clean and sanitize to maintain a hygienic environment for the infant.
- Check for Durability: Invest in well-made toys that can withstand chewing, pulling, and other activities without posing a safety risk.
- Read Reviews and Recommendations: Gather insights from reviews and seek recommendations from trusted sources to make informed choices when selecting infant toys.
Nutrient-Rich Delights: 8 Healthy Recipes for Homemade Baby Food
- Explore a world of flavor and nutrition with our nutrient-rich homemade baby food recipes.
- Introduce your little one to a variety of tastes while ensuring they receive essential vitamins and minerals.
- From creamy avocado puree to sweet potato mash, these recipes offer a delicious way to support your baby’s growth.
- Create wholesome meals using fresh ingredients, promoting a foundation for healthy eating habits from the start.
- Boost your baby’s immune system with homemade blueberry and yogurt blends, packed with antioxidants and probiotics.
- Experiment with colorful veggie purees like carrot and pea, providing essential nutrients for optimal development.
- Say goodbye to store-bought jars and embrace the joy of preparing nourishing meals that cater to your baby’s unique taste preferences.
Baby Health and Safety: A Comprehensive Guide for Parents
- Safe sleep practices: Use a firm mattress and remove soft bedding to reduce the risk of Sudden Infant Death Syndrome (SIDS).
- Proper vaccination schedule: Ensure timely vaccinations to protect against common childhood diseases and infections.
- Childproofing the home: Install safety gates, secure furniture, and cover electrical outlets to create a safe environment for exploration.
- Supervised tummy time: Encourage supervised tummy time to promote strong neck and shoulder muscles and reduce the risk of flat head syndrome.
- Healthy nutrition: Provide a balanced diet with age-appropriate foods to support growth and development.
- Regular pediatric check-ups: Schedule routine visits with a pediatrician to monitor physical and developmental milestones.
- Car seat safety: Always use a properly installed car seat appropriate for the child’s age, weight, and height to ensure safe travels.

